Goals
- Make a mathematics code execution environment using OpenReward and Daytona.
- Deploy the environment to OpenReward.
- Sample from the environment using a model of your choice.
Prerequisites
- You have completed the Your First Environment tutorial
- An OpenReward account
- An OpenReward API key
- A Daytona API key
- An API key and SDK for your model provider of choice (e.g. OpenAI, Anthropic, Google, OpenRouter)
Setup
Environments in OpenReward are written using ORS. ORS is implemented in the OpenReward Python library, and we will use it for this tutorial. You can install the library using pip or uv:pip install openreward
daytona Python SDK:
pip install daytona
Introduction
ORS environments can be configured to work with any sandbox provider. In this tutorial we will show how to initialise a Daytona sandbox within an ORS environment. We’ll setup a simple mathematics environment and give an agent access to a sandbox for executing code. By the end of this tutorial, you will understand how to use Daytona as an integration for making environments with ORS and OpenReward.Getting Started
In the Your First Environment tutorial, we built a mathematics environment using the GSM8K dataset. We will use a similar dataset here, but this time we will give an agent an access to a Daytona sandbox for code execution. First, let’s initialise our environmentgsm8ksandbox:
orwd init gsm8ksandbox --template basic
cd gsm8k && ls
parquet files from the GSM8K HuggingFace repository and put them in the root of our project:
test-00000-of-00001.parquet
train-00000-of-00001.parquet
{'question': 'Natalia sold clips to 48 of her friends in April, and then she sold half as many clips in May. How many clips did Natalia sell altogether in April and May?', 'answer': 'Natalia sold 48/2 = <<48/2=24>>24 clips in May.\nNatalia sold 48+24 = <<48+24=72>>72 clips altogether in April and May.\n#### 72', 'id': '0'}
- Loading the tasks from the
parquetfiles - Verifying the answer is correct - we’ll use the MathVerify library for this.
from math_verify import parse, verify
import pandas as pd
from pydantic import BaseModel
from typing import Optional
from daytona import Daytona, DaytonaConfig

from openreward.environments import Environment, JSONObject, Server, Split, TextBlock, ToolOutput, tool

class GSM8KTaskSpec(BaseModel):
    id: str
    question: str
    answer: str


class AnswerParams(BaseModel):
    answer: str


train_tasks = pd.read_parquet("train-00000-of-00001.parquet").to_dict(orient="records")
test_tasks = pd.read_parquet("test-00000-of-00001.parquet").to_dict(orient="records")

for i, task in enumerate(train_tasks):
    task['id'] = str(i)
for i, task in enumerate(test_tasks):
    task['id'] = str(i)


class GSM8KSandbox(Environment):
    """
    A GSM8K sandbox environment
    """
    def __init__(self, task_spec: JSONObject = {}, secrets: dict[str, str] = {}):
        super().__init__(task_spec)
        self.config = GSM8KTaskSpec.model_validate(task_spec)

    @classmethod
    def list_tasks(cls, split: str) -> list[JSONObject]:
        if split == "train":
            return train_tasks
        elif split == "test":
            return test_tasks
        raise ValueError(f"Unknown split: {split}")

    @classmethod
    def list_splits(cls):
        return [Split(name="train", type="train"), Split(name="test", type="test")]

    def get_prompt(self) -> str:
        return [TextBlock(type="text", text=self.config.question)]

    @tool
    def answer(self, params: AnswerParams) -> ToolOutput:
        """
        The answer tool can be used to submit your final answer. Note that this finishes the episode.
        """
        gold = parse(self.config.answer)
        answer = parse(params.answer)
        is_correct = verify(gold, answer)

        if is_correct:
            agent_message = "Correct!"
            reward = 1.0
        else:
            agent_message = "Wrong!"
            reward = 0.0

        return ToolOutput(
            blocks=[TextBlock(type="text", text=agent_message)],
            reward=reward,
            finished=True
        )

if __name__ == "__main__":
    Server([GSM8KSandbox]).run()
math-verify requirement:
pip install math-verify
__init__:
def __init__(self, task_spec: JSONObject = {}, secrets: dict[str, str] = {}):
    super().__init__(task_spec)
    self.config = GSM8KTaskSpec.model_validate(task_spec)

    self.api_key = secrets.get("daytona_api_key")
    if not self.api_key:
        raise ValueError("Daytona API key must be provided via secrets parameter")

    self.sandbox = None
setup and teardown method:
def setup(self) -> None:
    daytona = Daytona(DaytonaConfig(api_key=self.api_key))
    self.sandbox = daytona.create()

def teardown(self) -> None:
    if self.sandbox is not None:
        self.sandbox.delete()
bash tool. First we’ll add the Pydantic model:
class BashParams(BaseModel, extra="forbid"):
    command: str
    timeout: Optional[float] = 30.0
bash tool to the class:
@tool
def bash(self, params: BashParams) -> ToolOutput:
    """Execute bash commands using the computer instance."""
    try:
        response = self.sandbox.process.exec(params.command.strip())
        result_dict = {
            "stdout": response.result if response.exit_code == 0 else "",
            "stderr": response.result if response.exit_code != 0 else "",
            "exit_code": response.exit_code,
        }

        # What the model sees as tool text output
        text_out = result_dict["stdout"] or result_dict["stderr"] or str(result_dict)

        return ToolOutput(
            blocks=[TextBlock(type="text", text=text_out)],
            metadata={"output": result_dict},  # JSON-safe now
            reward=0.0,
            finished=False,
        )
    except Exception as e:
        return ToolOutput(
            metadata={"error": str(e)},
            blocks=[TextBlock(text=f"Error executing command: {str(e)}")],
            finished=False
        )
python server.py
- OpenAI
- Anthropic
- Google
- OpenRouter
1
Set your API key
Make sure you have an API key for OpenAI, and set the environment variable:
export OPENAI_API_KEY='your-openai-api-key-here'
export DAYTONA_API_KEY='your-daytona-api-key-here'
2
Create your code
Save this as
sample_agent.py:from openai import OpenAI
from openreward import OpenReward
import os
import json
or_client = OpenReward()
oai_client = OpenAI()
MODEL_NAME = "gpt-5.4"
environment = or_client.environments.get(name="gsm8ksandbox", base_url="http://localhost:8080")
tasks = environment.list_tasks(split="train")
tools = environment.list_tools(format="openai")
example_task = tasks[0]
with environment.session(task=example_task, secrets={"daytona_api_key": os.getenv("DAYTONA_API_KEY")}) as session:
prompt = session.get_prompt()
input_list = [{"role": "user", "content": prompt[0].text}]
finished = False
print(input_list)
while not finished:
response = oai_client.responses.create(
model=MODEL_NAME,
tools=tools,
input=input_list
)
print(response.output)
input_list += response.output
for item in response.output:
if item.type == "function_call":
tool_result = session.call_tool(item.name, json.loads(str(item.arguments)))
reward = tool_result.reward
finished = tool_result.finished
input_list.append({
"type": "function_call_output",
"call_id": item.call_id,
"output": json.dumps({
"result": tool_result.blocks[0].text
})
})
print(input_list[-1])
if tool_result.finished:
finished = True
break
3
Run your code
python sample_agent.py
[{'role': 'user', 'content': 'Natalia sold clips to 48 of her friends in April, and then she sold half as many clips in May. How many clips did Natalia sell altogether in April and May?\n\nUse the bash tool to execute commands.'}]
[ResponseFunctionToolCall(arguments='{"command":"python3 - << \'PY\'\\napril=48\\nmay=april/2\\ntotal=april+may\\nprint(int(total))\\nPY","timeout":100000}', call_id='call_kshkbrFlQtJcnu7pAR0x4aGH', name='bash', type='function_call', id='fc_0a2052fb4b543cf400699aeb18dc288192b0d106902d87d69b', status='completed')]
{'type': 'function_call_output', 'call_id': 'call_kshkbrFlQtJcnu7pAR0x4aGH', 'output': '{"result": "72"}'}
[ResponseOutputMessage(id='msg_0a2052fb4b543cf400699aeb1b3c78819289bfc6c76a734ee3', content=[ResponseOutputText(annotations=[], text='Natalia sold 48 clips in April. In May, she sold half as many: \\(48 \\div 2 = 24\\).  \nAltogether, she sold \\(48 + 24 = 72\\) clips.', type='output_text', logprobs=[])], role='assistant', status='completed', type='message')]
[ResponseFunctionToolCall(arguments='{"answer":"Natalia sold 48 clips in April. In May, she sold half as many: \\\\(48 \\\\div 2 = 24\\\\).  \\nAltogether, she sold \\\\(48 + 24 = 72\\\\) clips."}', call_id='call_zC6RbMlTkH7Ws0OnZeQCPi9t', name='answer', type='function_call', id='fc_0a2052fb4b543cf400699aeb1cfd7c8192a72ecf312a5d2440', status='completed')]
{'type': 'function_call_output', 'call_id': 'call_zC6RbMlTkH7Ws0OnZeQCPi9t', 'output': '{"result": "Correct!"}'}
1
Set your API key
Make sure you have API key for Anthropic, and set the environment variable:
export ANTHROPIC_API_KEY='your-anthropic-api-key-here'
export DAYTONA_API_KEY='your-daytona-api-key-here'
2
Create your code
Save this as
sample_agent.py:import anthropic
from openreward import OpenReward
import json
import os
or_client = OpenReward()
ant_client = anthropic.Anthropic()
MODEL_NAME = "claude-sonnet-4-6"
environment = or_client.environments.get(name="gsm8ksandbox", base_url="http://localhost:8080")
tasks = environment.list_tasks(split="train")
tools = environment.list_tools(format="anthropic")
example_task = tasks[0]
with environment.session(task=example_task, secrets={"daytona_api_key": os.getenv("DAYTONA_API_KEY")}) as session:
prompt = session.get_prompt()
messages = [{"role": "user", "content": prompt[0].text}]
finished = False
print(messages)
while not finished:
message = ant_client.messages.create(
model=MODEL_NAME,
max_tokens=4096,
tools=tools,
messages=messages
)
messages.append({
"role": "assistant",
"content": message.content,
})
print(messages[-1])
if message.stop_reason == "tool_use":
tool_uses = [b for b in message.content if getattr(b, "type", None) == "tool_use"]
if not tool_uses:
raise RuntimeError("stop_reason was tool_use but no tool_use blocks found")
tool_result_blocks = []
finished = False
for tu in tool_uses:
tool_name = tu.name
tool_input = tu.input
try:
tr = session.call_tool(tool_name, tool_input)
# Convert OpenReward blocks -> string safely
text_parts = []
for b in getattr(tr, "blocks", []) or []:
t = getattr(b, "text", None)
if t is not None:
text_parts.append(t)
else:
text_parts.append(str(b))
tool_text = "".join(text_parts)
tool_result_blocks.append({
"type": "tool_result",
"tool_use_id": tu.id,
"content": tool_text,
})
# Track termination if the env says we're done
if getattr(tr, "finished", False):
finished = True
except Exception as e:
tool_result_blocks.append({
"type": "tool_result",
"tool_use_id": tu.id,
"content": f"Tool execution failed: {type(e).__name__}: {e}",
"is_error": True,
})
messages.append({
"role": "user",
"content": tool_result_blocks
})
print(messages[-1])
continue
3
Run your code
python sample_agent.py
[{'role': 'user', 'content': 'Natalia sold clips to 48 of her friends in April, and then she sold half as many clips in May. How many clips did Natalia sell altogether in April and May?\n\nUse the bash tool to execute commands.'}]
{'role': 'assistant', 'content': [TextBlock(text="I'll help you solve this math problem using the bash tool to calculate the answer.", type='text'), ToolUseBlock(id='toolu_01XbashToolExample123', input={'command': 'python3 - << \'PY\'\napril=48\nmay=april/2\ntotal=april+may\nprint(int(total))\nPY', 'timeout': 100000}, name='bash', type='tool_use')]}
{'role': 'user', 'content': [{'type': 'tool_result', 'tool_use_id': 'toolu_01XbashToolExample123', 'content': '72'}]}
{'role': 'assistant', 'content': [TextBlock(text='Natalia sold 48 clips in April. In May, she sold half as many: 48 ÷ 2 = 24.  \nAltogether, she sold 48 + 24 = 72 clips.', type='text'), ToolUseBlock(id='toolu_01HEJromRn1bMcU8HM5jQZDF', input={'answer': 'Natalia sold 48 clips in April. In May, she sold half as many: 48 ÷ 2 = 24.  \nAltogether, she sold 48 + 24 = 72 clips.'}, name='answer', type='tool_use')]}
{'role': 'user', 'content': [{'type': 'tool_result', 'tool_use_id': 'toolu_01HEJromRn1bMcU8HM5jQZDF', 'content': 'Correct!'}]}
1
Set your API key
Make sure you have an API key for Gemini and set it as an environment variable:
export GEMINI_API_KEY='your-gemini-api-key-here'
export DAYTONA_API_KEY='your-daytona-api-key-here'
2
Create your code
Save this as
sample_agent.py:from google import genai
from google.genai import types
from openreward import OpenReward
import json
import os
or_client = OpenReward()
gem_client = genai.Client()
MODEL_NAME = "gemini-2.5-flash"
environment = or_client.environments.get(name="gsm8ksandbox", base_url="http://localhost:8080")
tasks = environment.list_tasks(split="train")
tools = environment.list_tools(format="google")
genai_tools = [types.Tool(function_declarations=tools)]
genai_config = types.GenerateContentConfig(tools=genai_tools)
example_task = tasks[0]
with environment.session(task=example_task, secrets={"daytona_api_key": os.getenv("DAYTONA_API_KEY")}) as session:
prompt = session.get_prompt()
contents = [
types.Content(
role="user", parts=[types.Part(text=prompt[0].text)]
)
]
finished = False
print(contents)
while not finished:
response = gem_client.models.generate_content(
model=MODEL_NAME,
config=genai_config,
contents=contents
)
print(response.candidates[0].content)
contents.append(response.candidates[0].content) # Append the content from the model's response.
for part in response.candidates[0].content.parts:
if part.function_call:
tool_call = part.function_call
tool_result = session.call_tool(tool_call.name, tool_call.args)
reward = tool_result.reward
finished = tool_result.finished
function_response_part = types.Part.from_function_response(
name=tool_call.name,
response={"result": json.dumps({
"result": tool_result.blocks[0].text
})},
)
contents.append(types.Content(role="user", parts=[function_response_part])) # Append the function response
print(contents[-1])
if tool_result.finished:
finished = True
break
3
Run your code
python sample_agent.py
[Content(
parts=[
    Part(
    text='Natalia sold clips to 48 of her friends in April, and then she sold half as many clips in May. How many clips did Natalia sell altogether in April and May?\n\nUse the bash tool to execute commands.'
    ),
],
role='user'
)]
parts=[Part(
function_call=FunctionCall(
    args={
    'command': "python3 - << 'PY'\napril=48\nmay=april/2\ntotal=april+may\nprint(int(total))\nPY",
    'timeout': 100000
    },
    name='bash'
)
)] role='model'
parts=[Part(
function_response=FunctionResponse(
    name='bash',
    response={
    'result': '{"result": "72"}'
    }
)
)] role='user'
parts=[Part(
text='Natalia sold 48 clips in April. In May, she sold half as many: 48 ÷ 2 = 24.  \nAltogether, she sold 48 + 24 = 72 clips.'
)] role='model'
parts=[Part(
function_call=FunctionCall(
    args={
    'answer': 'Natalia sold 48 clips in April. In May, she sold half as many: 48 ÷ 2 = 24.  \nAltogether, she sold 48 + 24 = 72 clips.'
    },
    name='answer'
)
)] role='model'
parts=[Part(
function_response=FunctionResponse(
    name='answer',
    response={
    'result': '{"result": "Correct!"}'
    }
)
)] role='user'
1
Set your API key
Make sure you have an API key for OpenRouter and set it as an environment variables:
export OPENROUTER_API_KEY='your-openrouter-api-key-here'
export DAYTONA_API_KEY='your-daytona-api-key-here'
2
Create your code
Save this as
sample_agent.py:from openai import OpenAI
from openreward import OpenReward
import json
import os
or_client = OpenReward()
oai_client = OpenAI(
base_url="https://openrouter.ai/api/v1",
api_key=os.environ.get("OPENROUTER_API_KEY")
)
MODEL_NAME = "deepseek/deepseek-v3.2"
environment = or_client.environments.get(name="gsm8ksandbox", base_url="http://localhost:8080")
tasks = environment.list_tasks(split="train")
tools = environment.list_tools(format="openrouter")
example_task = tasks[0]
with environment.session(task=example_task, secrets={"daytona_api_key": os.getenv("DAYTONA_API_KEY")}) as session:
prompt = session.get_prompt()
input_list = [{"role": "user", "content": prompt[0].text}]
finished = False
print(input_list)
while not finished:
response = oai_client.chat.completions.create(
model=MODEL_NAME,
tools=tools,
messages=input_list
)
input_list.append({
"role": "assistant",
"content": response.choices[0].message.content,
"tool_calls": response.choices[0].message.tool_calls
})
print(input_list[-1])
tool_calls = response.choices[0].message.tool_calls
if not tool_calls:
break
for tool_call in response.choices[0].message.tool_calls:
tool_name = tool_call.function.name
tool_args = json.loads(tool_call.function.arguments)
tool_result = session.call_tool(tool_name, tool_args)
reward = tool_result.reward
finished = tool_result.finished
input_list.append({
"role": "tool",
"tool_call_id": tool_call.id,
"content": json.dumps({
"result": tool_result.blocks[0].text
})
})
print(input_list[-1])
if tool_result.finished:
finished = True
break
3
Run your code
python sample_agent.py
[{'role': 'user', 'content': 'Natalia sold clips to 48 of her friends in April, and then she sold half as many clips in May. How many clips did Natalia sell altogether in April and May?\n\nUse the bash tool to execute commands.'}]
{'role': 'assistant', 'content': None, 'tool_calls': [ChatCompletionMessageFunctionToolCall(id='call_bash_example_001', function=Function(arguments='{"command":"python3 - << \'PY\'\\napril=48\\nmay=april/2\\ntotal=april+may\\nprint(int(total))\\nPY","timeout":100000}', name='bash'), type='function')]}
{'role': 'tool', 'tool_call_id': 'call_bash_example_001', 'content': '{"result": "72"}'}
{'role': 'assistant', 'content': 'Natalia sold 48 clips in April. In May, she sold half as many: 48 ÷ 2 = 24.  \nAltogether, she sold 48 + 24 = 72 clips.', 'tool_calls': [ChatCompletionMessageFunctionToolCall(id='019af3af119248e0f1cd239559746033', function=Function(arguments='{"answer": "Natalia sold 48 clips in April. In May, she sold half as many: 48 ÷ 2 = 24.  \\nAltogether, she sold 48 + 24 = 72 clips."}', name='answer'), type='function')]}
{'role': 'tool', 'tool_call_id': '019af3af119248e0f1cd239559746033', 'content': '{"result": "Correct!"}'}
- Infrastructure: you do not have to set up infrastructure and compute to host the environment yourself. We take care of this and you are only charged based on your actual usage of the environment.
- Discovery: your environment can be discovered and used by other users of the platform, helping drive adoption and attention to your work.
Host on OpenReward
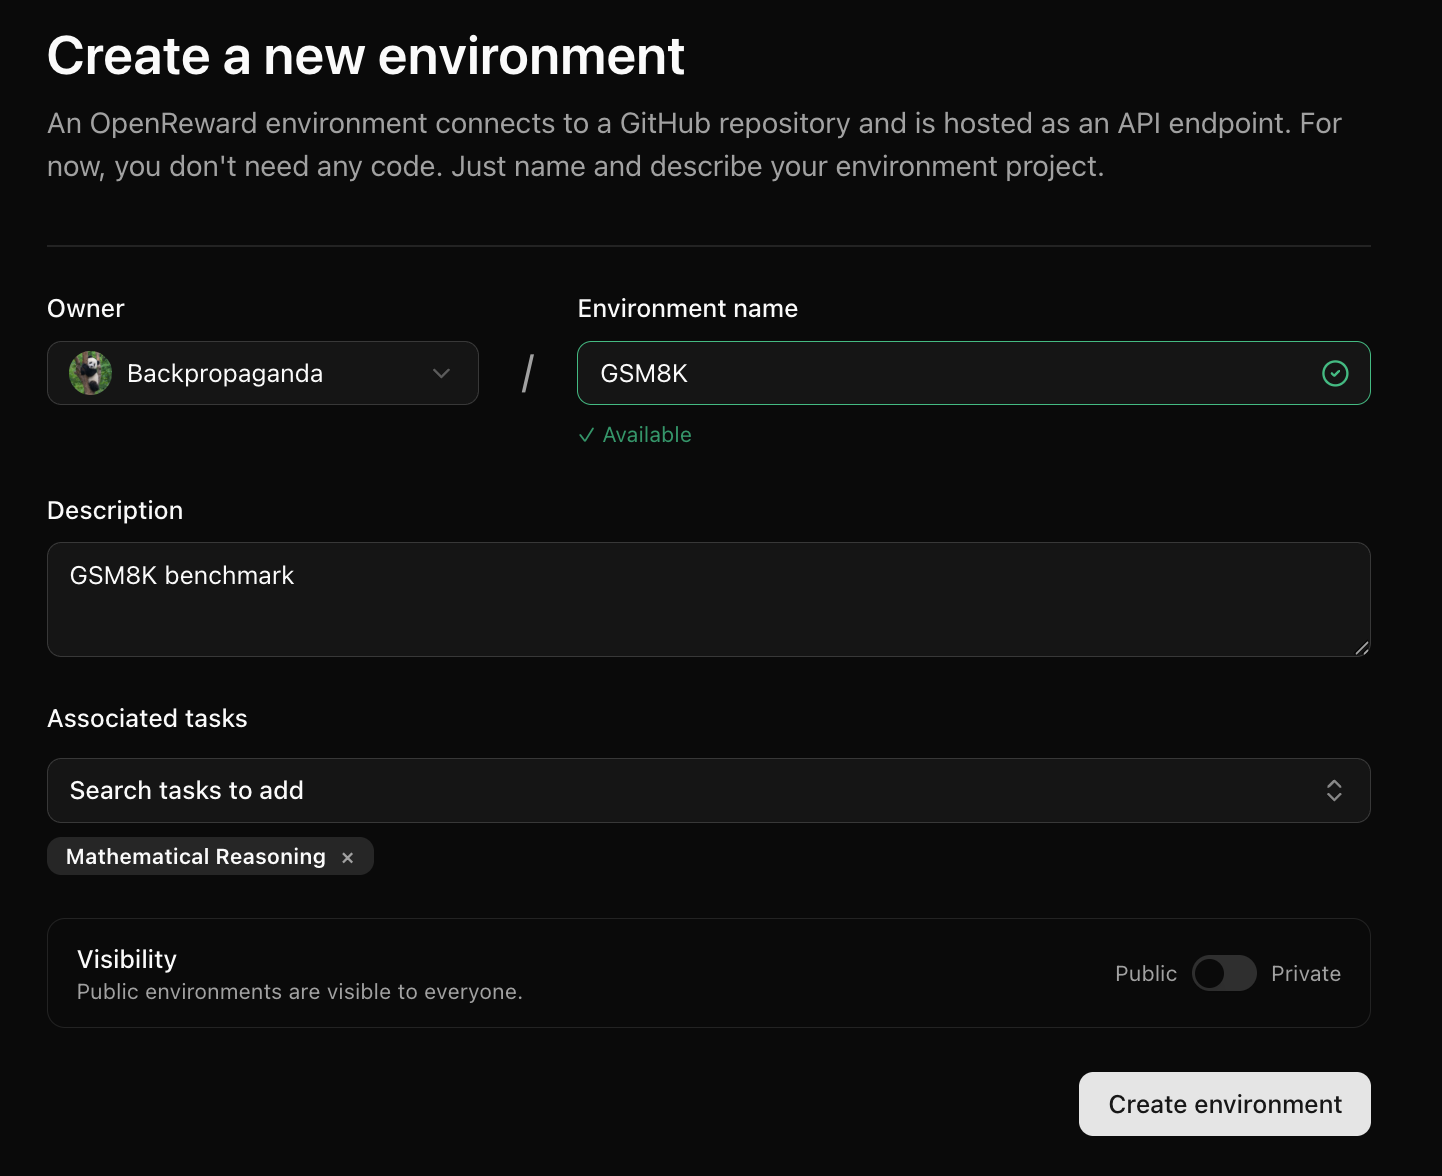
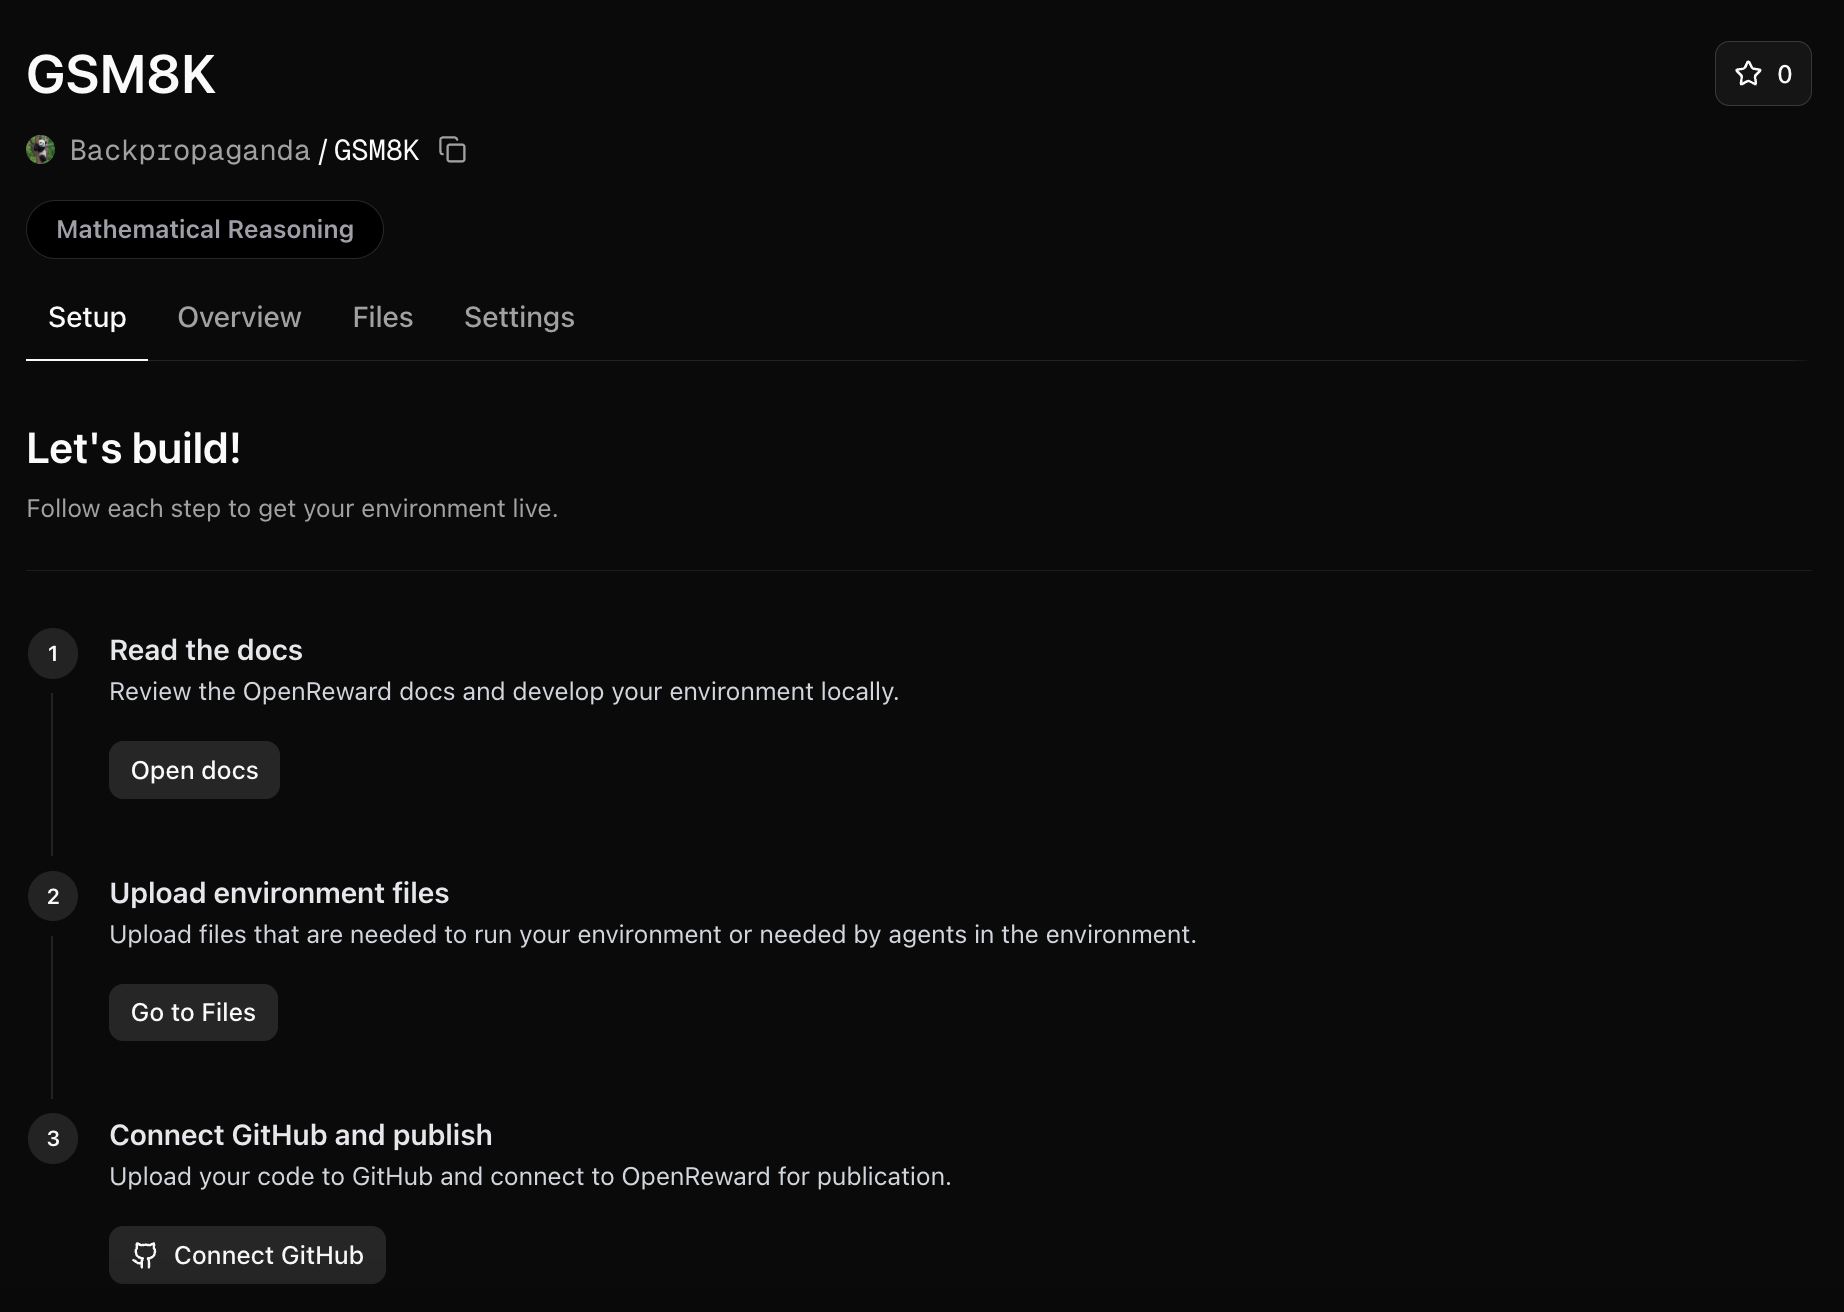
Log into OpenReward, press the plus icon in the navbar and press New Environment: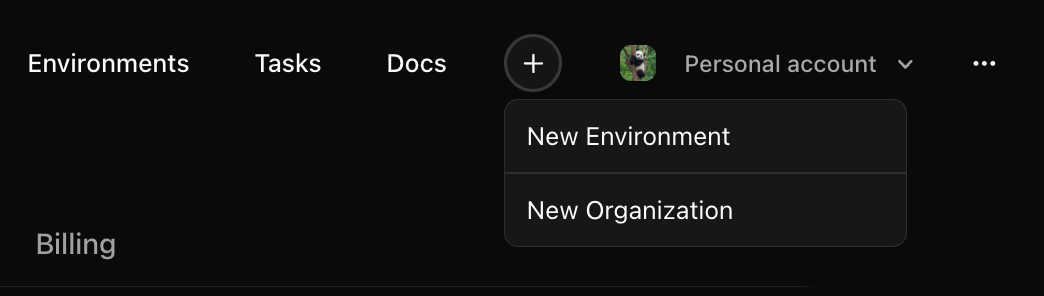
Upload environment files
We will need a way to use the train and test parquet files in our environment. We’ll upload these to the environment files: Click on the Files tab and upload each file: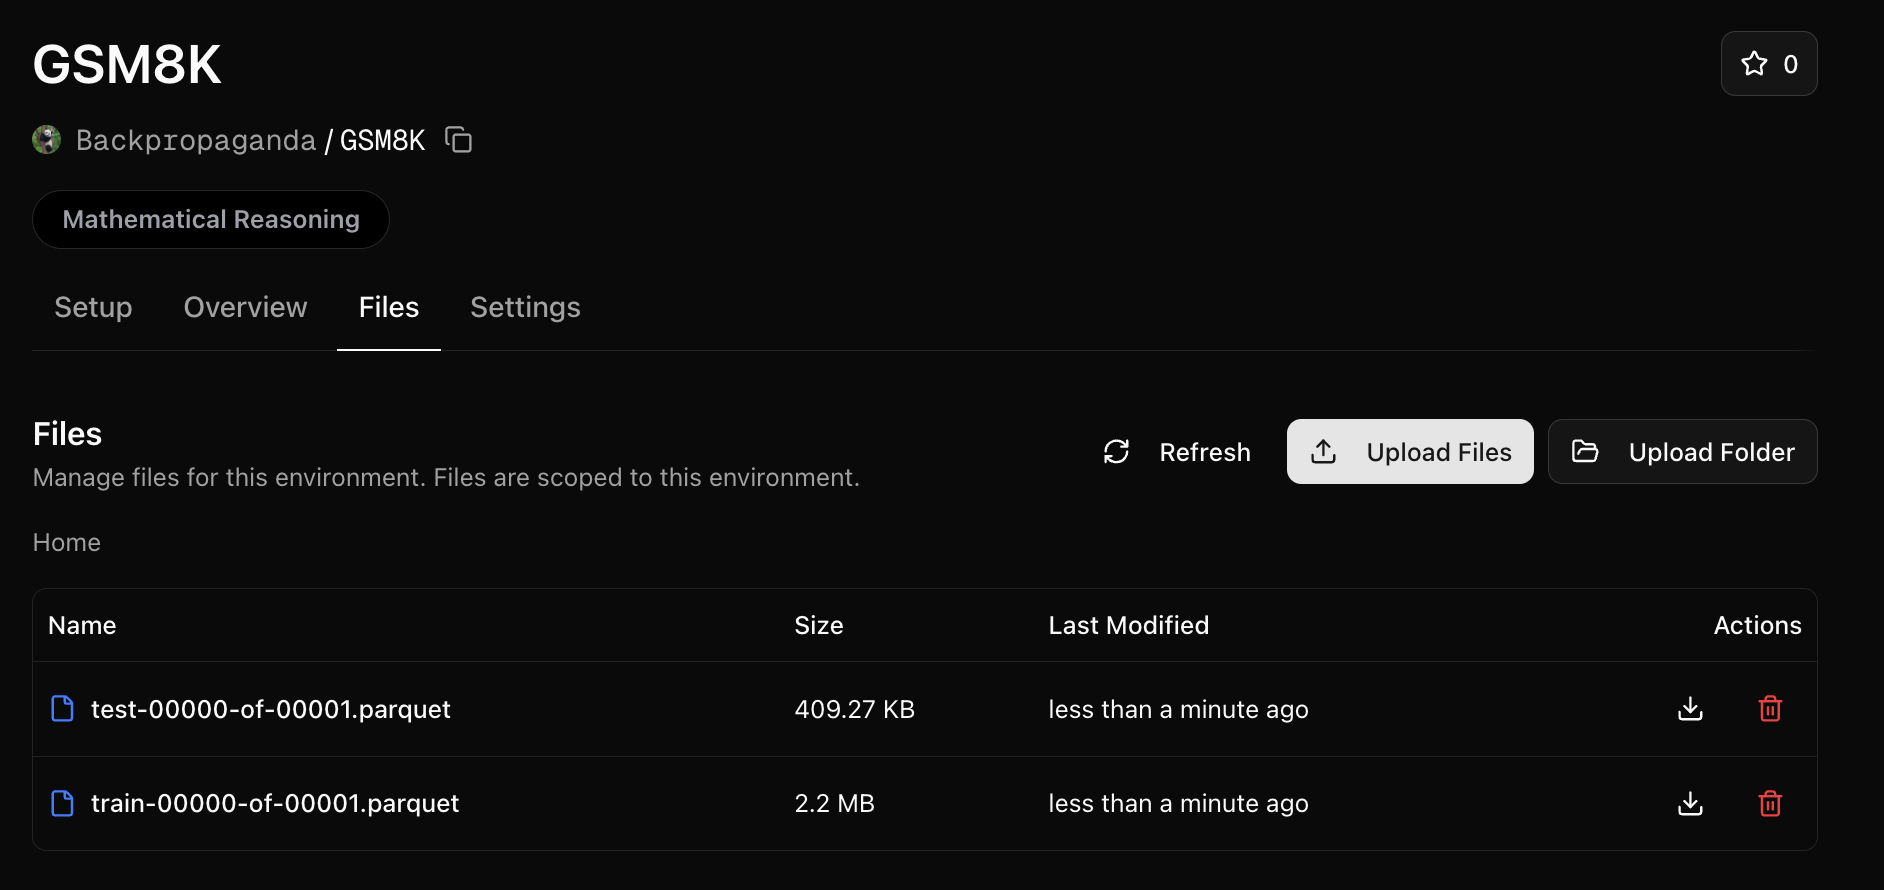
/orwd_data directory.
We’ll need to reference this folder in our server.py. Make the following change:
train_tasks = pd.read_parquet("/orwd_data/train-00000-of-00001.parquet").to_dict(orient="records")
test_tasks = pd.read_parquet("/orwd_data/test-00000-of-00001.parquet").to_dict(orient="records")
/orwd_data prefix).
Write the Dockerfile and requirements
We’ll need aDockerfile in our repository:
FROM python:3.11-slim

RUN apt update && apt upgrade -y && apt install -y \
    curl

WORKDIR /app

# Copy requirements and install dependencies
COPY requirements.txt .
RUN pip install --no-cache-dir -r requirements.txt

# Copy application code
COPY server.py .

# Expose port
EXPOSE 8000

# Start the server
CMD ["python", "server.py"]
requirements.txt:
fastapi>=0.115.12
openreward
pandas
pyarrow
uvicorn>=0.34.3
math-verify[antlr4_13_2]
daytona
Push to GitHub and connect
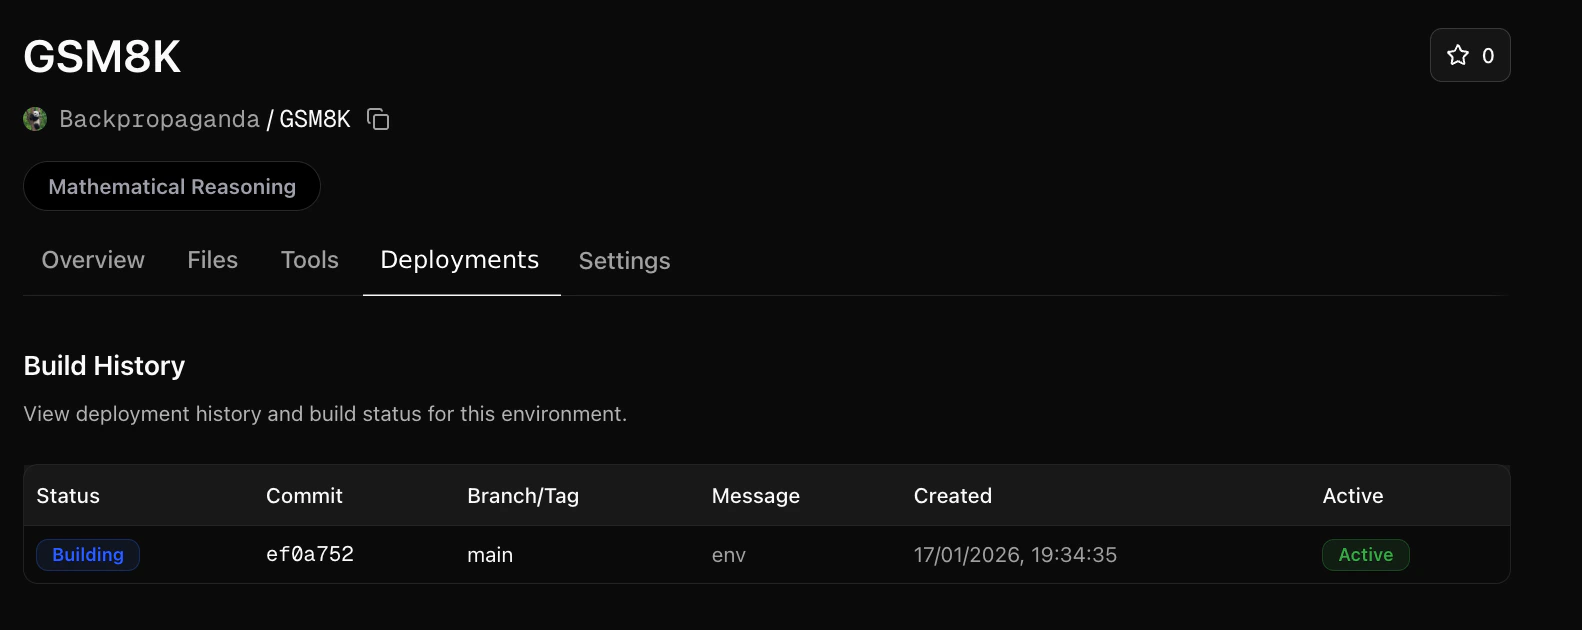
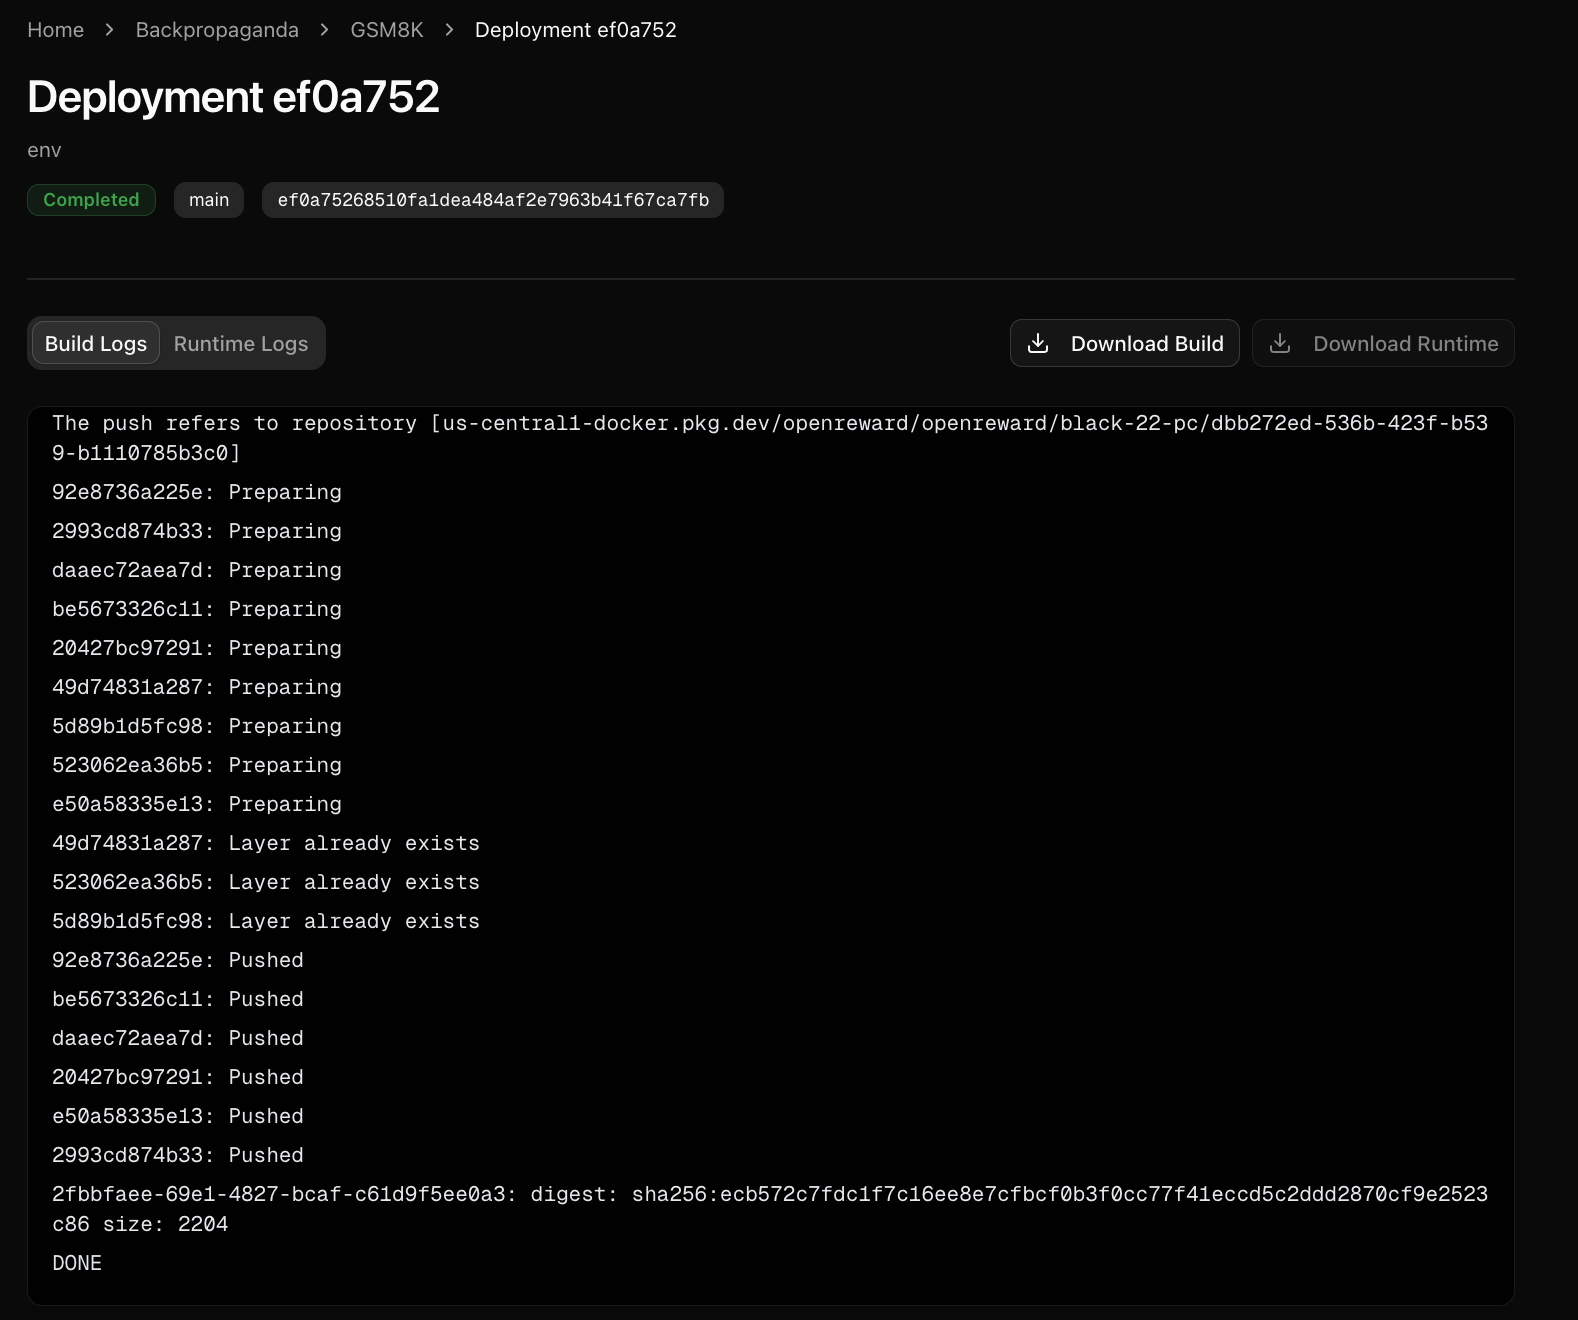
Next, push your environment code to a GitHub repository. Once your GitHub repository is ready, go to your OpenReward environment and connect the repository: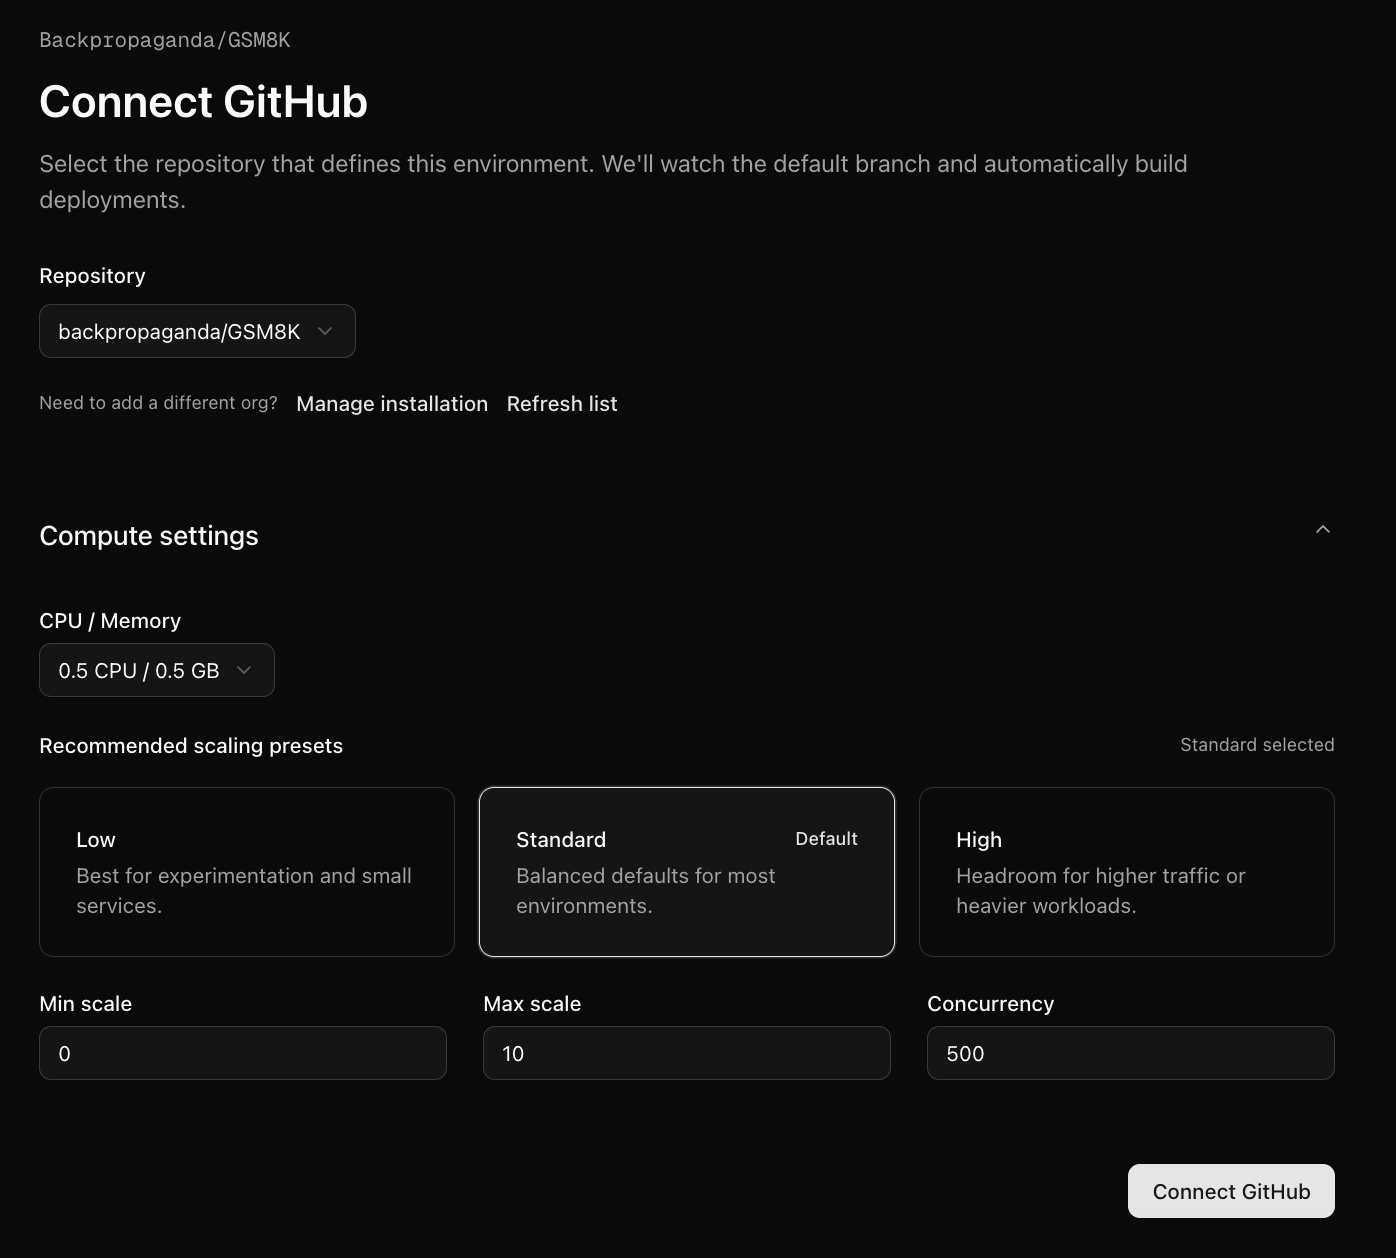
Sample from your environment
Now your environment is hosted on OpenReward, we can sample from it:- OpenAI
- Anthropic
- Google
- OpenRouter
- Other Models
1
Set your API keys
Make sure you have API keys for OpenReward and OpenAI, and set these as environment variables:
export OPENAI_API_KEY='your-openai-api-key-here'
export OPENREWARD_API_KEY='your-openreward-api-key-here'
export DAYTONA_API_KEY='your-daytona-api-key-here'
2
Create your code
Save this as
quickstart.py: from openai import OpenAI
from openreward import OpenReward
import json
import os
or_client = OpenReward()
oai_client = OpenAI()
MODEL_NAME = "gpt-5.4"
environment = or_client.environments.get(name="yourusername/gsm8k")
tasks = environment.list_tasks(split="train")
tools = environment.list_tools(format="openai")
example_task = tasks[0]
with environment.session(task=example_task, secrets={"daytona_api_key": os.getenv("DAYTONA_API_KEY")}) as session:
prompt = session.get_prompt()
input_list = [{"role": "user", "content": prompt[0].text}]
finished = False
print(input_list)
while not finished:
response = oai_client.responses.create(
model=MODEL_NAME,
tools=tools,
input=input_list
)
print(response.output)
input_list += response.output
for item in response.output:
if item.type == "function_call":
tool_result = session.call_tool(item.name, json.loads(str(item.arguments)))
reward = tool_result.reward
finished = tool_result.finished
input_list.append({
"type": "function_call_output",
"call_id": item.call_id,
"output": json.dumps({
"result": tool_result.blocks[0].text
})
})
print(input_list[-1])
if tool_result.finished:
finished = True
break
3
Run your code
python quickstart.py
[{'role': 'user', 'content': 'Natalia sold clips to 48 of her friends in April, and then she sold half as many clips in May. How many clips did Natalia sell altogether in April and May?\n\nUse the bash tool to execute commands.'}]
[ResponseFunctionToolCall(arguments='{"command":"python3 - << \'PY\'\\napril=48\\nmay=april/2\\ntotal=april+may\\nprint(int(total))\\nPY","timeout":100000}', call_id='call_kshkbrFlQtJcnu7pAR0x4aGH', name='bash', type='function_call', id='fc_0a2052fb4b543cf400699aeb18dc288192b0d106902d87d69b', status='completed')]
{'type': 'function_call_output', 'call_id': 'call_kshkbrFlQtJcnu7pAR0x4aGH', 'output': '{"result": "72"}'}
[ResponseOutputMessage(id='msg_0a2052fb4b543cf400699aeb1b3c78819289bfc6c76a734ee3', content=[ResponseOutputText(annotations=[], text='Natalia sold 48 clips in April. In May, she sold half as many: \\(48 \\div 2 = 24\\).  \nAltogether, she sold \\(48 + 24 = 72\\) clips.', type='output_text', logprobs=[])], role='assistant', status='completed', type='message')]
[ResponseFunctionToolCall(arguments='{"answer":"Natalia sold 48 clips in April. In May, she sold half as many: \\\\(48 \\\\div 2 = 24\\\\).  \\nAltogether, she sold \\\\(48 + 24 = 72\\\\) clips."}', call_id='call_zC6RbMlTkH7Ws0OnZeQCPi9t', name='answer', type='function_call', id='fc_0a2052fb4b543cf400699aeb1cfd7c8192a72ecf312a5d2440', status='completed')]
{'type': 'function_call_output', 'call_id': 'call_zC6RbMlTkH7Ws0OnZeQCPi9t', 'output': '{"result": "Correct!"}'}
1
Set your API keys
Make sure you have API keys for OpenReward and Anthropic, and set these as environment variables:
export ANTHROPIC_API_KEY='your-anthropic-api-key-here'
export OPENREWARD_API_KEY='your-openreward-api-key-here'
export DAYTONA_API_KEY='your-daytona-api-key-here'
2
Create your code
Save this as
quickstart.py: import anthropic
from openreward import OpenReward
import json
import os
or_client = OpenReward()
ant_client = anthropic.Anthropic()
MODEL_NAME = "claude-sonnet-4-6"
environment = or_client.environments.get(name="yourusername/gsm8k")
tasks = environment.list_tasks(split="train")
tools = environment.list_tools(format="anthropic")
example_task = tasks[0]
with environment.session(task=example_task, secrets={"daytona_api_key": os.getenv("DAYTONA_API_KEY")}) as session:
prompt = session.get_prompt()
messages = [{"role": "user", "content": prompt[0].text}]
finished = False
print(messages)
while not finished:
response = ant_client.messages.create(
model=MODEL_NAME,
max_tokens=4096,
tools=tools,
messages=messages
)
print(message)
messages.append(message)
if message.stop_reason == "tool_use":
tool_use = next(block for block in message.content if block.type == "tool_use")
tool_name = tool_use.name
tool_input = tool_use.input
tool_result = session.call_tool(tool_name, tool_input)
reward = tool_result.reward
finished = tool_result.finished
messages.append({
"role": "user",
"content": [
{
"type": "tool_result",
"tool_use_id": tool_use.id,
"content": tool_result.blocks[0].text
}
]
})
print(messages[-1])
if tool_result.finished:
finished = True
break
3
Run your code
python quickstart.py
[{'role': 'user', 'content': 'Natalia sold clips to 48 of her friends in April, and then she sold half as many clips in May. How many clips did Natalia sell altogether in April and May?\n\nUse the bash tool to execute commands.'}]
{'role': 'assistant', 'content': [TextBlock(text="I'll help you solve this math problem using the bash tool to calculate the answer.", type='text'), ToolUseBlock(id='toolu_01XbashToolExample123', input={'command': 'python3 - << \'PY\'\napril=48\nmay=april/2\ntotal=april+may\nprint(int(total))\nPY', 'timeout': 100000}, name='bash', type='tool_use')]}
{'role': 'user', 'content': [{'type': 'tool_result', 'tool_use_id': 'toolu_01XbashToolExample123', 'content': '72'}]}
{'role': 'assistant', 'content': [TextBlock(text='Natalia sold 48 clips in April. In May, she sold half as many: 48 ÷ 2 = 24.  \nAltogether, she sold 48 + 24 = 72 clips.', type='text'), ToolUseBlock(id='toolu_01HEJromRn1bMcU8HM5jQZDF', input={'answer': 'Natalia sold 48 clips in April. In May, she sold half as many: 48 ÷ 2 = 24.  \nAltogether, she sold 48 + 24 = 72 clips.'}, name='answer', type='tool_use')]}
{'role': 'user', 'content': [{'type': 'tool_result', 'tool_use_id': 'toolu_01HEJromRn1bMcU8HM5jQZDF', 'content': 'Correct!'}]}
1
Set your API keys
Make sure you have API keys for OpenReward and Gemini, and set these as environment variables:
export GEMINI_API_KEY='your-gemini-api-key-here'
export OPENREWARD_API_KEY='your-openreward-api-key-here'
export DAYTONA_API_KEY='your-daytona-api-key-here'
2
Create your code
Save this as
quickstart.py: from google import genai
from google.genai import types
from openreward import OpenReward
import json
import os
or_client = OpenReward()
gem_client = genai.Client()
MODEL_NAME = "gemini-2.5-flash"
environment = or_client.environments.get(name="yourusername/gsm8k")
tasks = environment.list_tasks(split="train")
tools = environment.list_tools(format="google")
genai_tools = [types.Tool(function_declarations=[f]) for f in tools]
genai_config = types.GenerateContentConfig(tools=genai_tools)
example_task = tasks[0]
with environment.session(task=example_task, secrets={"daytona_api_key": os.getenv("DAYTONA_API_KEY")}) as session:
prompt = session.get_prompt()
contents = [
types.Content(
role="user", parts=[types.Part(text=prompt[0].text)]
)
]
finished = False
print(contents)
while not finished:
response = gem_client.models.generate_content(
model=MODEL_NAME,
config=genai_config,
contents=contents
)
print(response.candidates[0].content)
contents.append(response.candidates[0].content) # Append the content from the model's response.
for part in response.candidates[0].content.parts:
if part.function_call:
tool_call = part.function_call
tool_result = session.call_tool(tool_call.name, tool_call.args)
reward = tool_result.reward
finished = tool_result.finished
function_response_part = types.Part.from_function_response(
name=tool_call.name,
response={"result": json.dumps({
"result": tool_result.blocks[0].text
})},
)
contents.append(types.Content(role="user", parts=[function_response_part])) # Append the function response
print(contents[-1])
if tool_result.finished:
finished = True
break
3
Run your code
python quickstart.py
[Content(
parts=[
    Part(
    text='Natalia sold clips to 48 of her friends in April, and then she sold half as many clips in May. How many clips did Natalia sell altogether in April and May?\n\nUse the bash tool to execute commands.'
    ),
],
role='user'
)]
parts=[Part(
function_call=FunctionCall(
    args={
    'command': "python3 - << 'PY'\napril=48\nmay=april/2\ntotal=april+may\nprint(int(total))\nPY",
    'timeout': 100000
    },
    name='bash'
)
)] role='model'
parts=[Part(
function_response=FunctionResponse(
    name='bash',
    response={
    'result': '{"result": "72"}'
    }
)
)] role='user'
parts=[Part(
text='Natalia sold 48 clips in April. In May, she sold half as many: 48 ÷ 2 = 24.  \nAltogether, she sold 48 + 24 = 72 clips.'
)] role='model'
parts=[Part(
function_call=FunctionCall(
    args={
    'answer': 'Natalia sold 48 clips in April. In May, she sold half as many: 48 ÷ 2 = 24.  \nAltogether, she sold 48 + 24 = 72 clips.'
    },
    name='answer'
)
)] role='model'
parts=[Part(
function_response=FunctionResponse(
    name='answer',
    response={
    'result': '{"result": "Correct!"}'
    }
)
)] role='user'
1
Set your API keys
Make sure you have API keys for OpenReward and OpenRouter, and set these as environment variables:
export OPENROUTER_API_KEY='your-openrouter-api-key-here'
export OPENREWARD_API_KEY='your-openreward-api-key-here'
export DAYTONA_API_KEY='your-daytona-api-key-here'
2
Create your code
Save this as
quickstart.py:from openai import OpenAI
from openreward import OpenReward
import json
import os
or_client = OpenReward()
oai_client = OpenAI(
base_url="https://openrouter.ai/api/v1",
api_key=os.environ.get("OPENROUTER_API_KEY")
)
MODEL_NAME = "deepseek/deepseek-v3.2"
environment = or_client.environments.get(name="yourusername/gsm8k")
tasks = environment.list_tasks(split="train")
tools = environment.list_tools(format="openrouter")
example_task = tasks[0]
with environment.session(task=example_task, secrets={"daytona_api_key": os.getenv("DAYTONA_API_KEY")}) as session:
prompt = session.get_prompt()
input_list = [{"role": "user", "content": prompt[0].text}]
finished = False
print(input_list)
while not finished:
response = oai_client.chat.completions.create(
model=MODEL_NAME,
tools=tools,
messages=input_list
)
print(response)
input_list.append(response)
tool_calls = response.choices[0].message.tool_calls
if not tool_calls:
return
for tool_call in response.choices[0].message.tool_calls:
tool_name = tool_call.function.name
tool_args = json.loads(tool_call.function.arguments)
tool_result = session.call_tool(tool_name, tool_args)
reward = tool_result.reward
finished = tool_result.finished
input_list.append({
"role": "tool",
"tool_call_id": tool_call.id,
"content": json.dumps({
"result": tool_result.blocks[0].text
})
})
print(input_list[-1])
if tool_result.finished:
finished = True
break
3
Run your code
python quickstart.py
[{'role': 'user', 'content': 'Natalia sold clips to 48 of her friends in April, and then she sold half as many clips in May. How many clips did Natalia sell altogether in April and May?\n\nUse the bash tool to execute commands.'}]
{'role': 'assistant', 'content': None, 'tool_calls': [ChatCompletionMessageFunctionToolCall(id='call_bash_example_001', function=Function(arguments='{"command":"python3 - << \'PY\'\\napril=48\\nmay=april/2\\ntotal=april+may\\nprint(int(total))\\nPY","timeout":100000}', name='bash'), type='function')]}
{'role': 'tool', 'tool_call_id': 'call_bash_example_001', 'content': '{"result": "72"}'}
{'role': 'assistant', 'content': 'Natalia sold 48 clips in April. In May, she sold half as many: 48 ÷ 2 = 24.  \nAltogether, she sold 48 + 24 = 72 clips.', 'tool_calls': [ChatCompletionMessageFunctionToolCall(id='019af3af119248e0f1cd239559746033', function=Function(arguments='{"answer": "Natalia sold 48 clips in April. In May, she sold half as many: 48 ÷ 2 = 24.  \\nAltogether, she sold 48 + 24 = 72 clips."}', name='answer'), type='function')]}
{'role': 'tool', 'tool_call_id': '019af3af119248e0f1cd239559746033', 'content': '{"result": "Correct!"}'}
If you are running with another provider, or using custom models, then here are the main principles to keep in mind.Using a context manager, we can start a session with the environment. This defines a scope in which
you can use the agent to call tools and get tool results.Above we have selected the first task to sample from, which is a particular problem in the CTF environment.
1
Set your API key
Make sure you have API keys for OpenReward and OpenRouter, and set these as environment variables:
export OPENROUTER_API_KEY='your-openrouter-api-key-here'
export OPENREWARD_API_KEY='your-openreward-api-key-here'
2
Get the environment, tools, and tasks
You’ll need to use the OpenReward client to access the environment and its main information
from openreward import OpenReward
or_client = OpenReward()

environment = or_client.environments.get(name="yourusername/gsm8k")
tasks = environment.list_tasks(split="train")
tools = environment.list_tools(format="openai")
example_task = tasks[0]
3
Start an environment session
with environment.session(task=example_task) as session:
4
Pass the prompt and tools list into your model
You can get the prompt for the task as follows:You will also need to pass in the
prompt = session.get_prompt()
tools into the context window of your model, usually somewhere in the system prompt.5
Define the core agent loop
An agent will usually keep interacting with an environment until it hits a termination state associated with the environment, or
some other imposed limit (e.g. maximum number of terms).In a simple sequential agent model, this could be a while loop like:where
while not finished:
finished is a boolean.6
Parse and execute tool calls
In agentic environments, actions are treated as tool calls. That means you need to have a way to parse tool calls from your model’s generations.The key thing to note is that for OpenReward environment, a tool call requires specifying a name (This means that you will need to parse out the
str) and some arguments (dict).To call a tool you will call: tool_result = session.call_tool(tool_name, tool_arguments)
tool_name and tool_arguments from your model’s generation and then parse this information into the
call_tool method.7
Parse and execute tool results
If you have executed an available tool correctly, you will receive a
ToolOutput output. This contains attributes for:reward: an (optional)floatdenoting reward. For example, submitting a correct math solution through asubmit_solutiontool might give a reward of1.0.finished: aboolspecifying whether the episode is finished or not. For example, some tools may end the episode (if for example an agent submits a final answer throughsubmit_solutionin a math task).data: adictwith output of the executing of the tool. For example, the stdout of executing abashtool. This information should be passed to the agent as feedback.
ToolOutput is:- Recording
rewardfor use in a policy gradient algorithm such as GRPO or PPO - Breaking out of the core agent loop if
finished=True - Adding
datato the context window as feedback and continuing with the next model generation
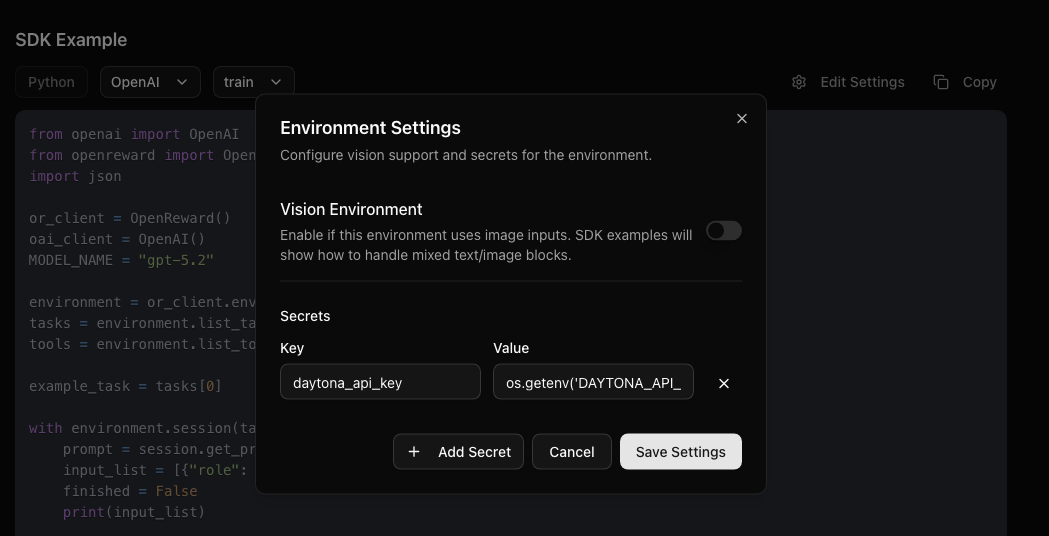
DAYTONA_API_KEY. Press Edit Settings near the SDK example then insert the code for environment variables: